
Volume 4 of The Body Transformation Series is here! We’ve been away a couple weeks with our series, as Julian and I both have had some prior business and travel commitments on our schedules.
If you missed volume 1, volume 2 or volume 3, we covered a lot so be sure to check those out as well for some high value health, fitness and nutrition info! You can search “volume” + the number in the search field and they’ll pop up.
Let’s get right into it..
In this series we’re covering soup prep recipes, dynamic stretching and flexibility training, as well as tips on getting maximum freshness out of your food!
– Soup Prep & Recipes: awesome way to have healthy, nutrient-dense foods in your fridge when you’re on the go or need a fast meal
– Dynamic Stretching & Flexibility: Julian and Vanessa will be demonstrating and explaining these stretches on video, as well as Julian gets into the key points to understand on when to do specific stretches and foam rolling to maximize your fitness program.
– Tips of the week: How to get maximum freshness out of your foods, and thus maximum nutrition in your body, with a few simple principles.
*note: you can click each above to “jump” down to that area of the post.
Recipe of the week: Soup Prep & Recipes
Making homemade soups can be a simple way to get extra fruit and vegetables in your diet without a lot of hassle, especially when they’re meal prepped and ready in the fridge.
In this series, I’m sharing five of my favorite soup recipes that I’ll meal prep and keep stored in my fridge for a fast go-to snack or meal when I’m on the go.
Soup #1: Carrot Ginger Dill
Soup #2: Spicy Asparagus & Cilantro
Soup #3: Roasted Cauliflower & Bacon
Soup #4: Broccoli Pear
Soup #5: Sweet Potato Apple
All of these soups are paleo-friendly. All but one are vegetarian & vegan-friendly and ReBoot-friendly (week 1+), the roasted cauliflower bacon. All soups are also gluten-free and dairy-free.
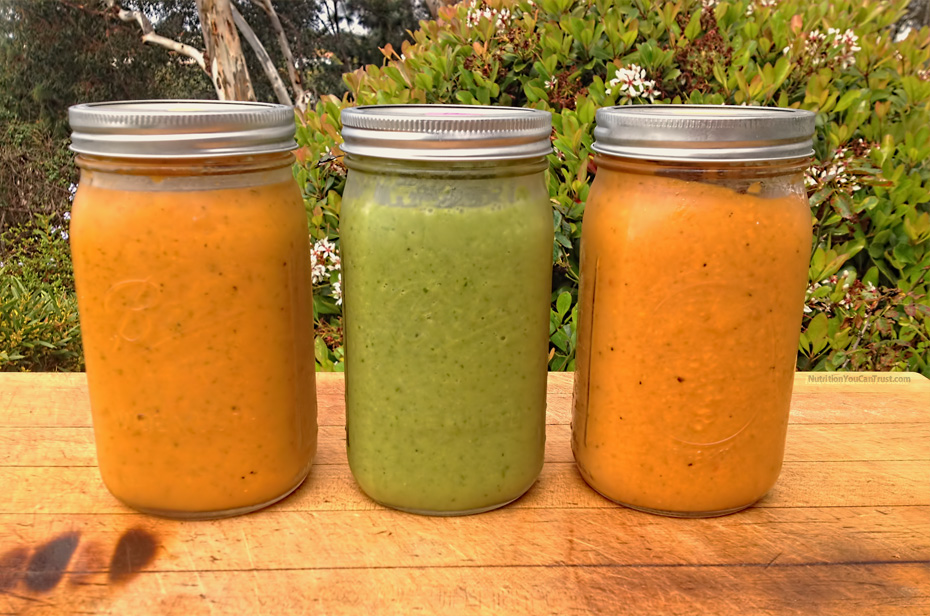
Personally, I’ll usually make one or two of these on the weekend as part of my meal prep and keep them stored in glass mason jars (see picture above), or if I make one for dinner during the week, I’ll make enough so I have plenty left over meal prepped and stored in jars to save me time and money the rest of my week. It’s super fast for me to grab some and eat cold, or quickly warm up for healthy snack or meal.

Carrot Ginger Dill Soup
Ingredients
2 pounds carrots
1 medium onion, chopped
1 tablespoon fresh ginger, grated
2 teaspoon dried dill
1 tablespoon fresh dill, chopped (for garnish)
3 cups chicken broth*
3 cups vegetable broth
Pink salt & pepper, to taste
*you can use 6 cups of vegetable broth to keep it vegetarian/vegan-friendly, and/or if you’re on ReBoot Transformation Protocol week 1 program design.
Directions
1. Scrub carrots (don’t peel) and chop into 1 inch thick slices. Place on baking sheet. Roughly chop onion and place on top of carrots on baking sheet.
2. Roast at 375 degrees until carrots are soft when pierced with a fork. Est. 15-20 minutes.
3. Let cool just a bit and place carrots, onions, dried dill and ginger into blender. Add 2 cups of the broth (either vegg or chicken).
4. Puree until smooth, adding a bit more broth if needed to blend thoroughly.
5. Pour mixture into large mixing bowl and whisk in the rest of the broth until smooth.
Serve in individual bowls garnished with fresh dill.

Spicy Asparagus & Cilantro Soup
Ingredients
2 lbs asparagus
1/3 cup coconut milk
1 medium yellow onion, chopped
1 bunch cilantro, chopped
2 garlic cloves, minced
3 cups vegetable broth
1 teaspoon pink salt
1 teaspoon pepper
1 teaspoon cayenne, optional (if don’t want it spicy)
1/2 tablespoon coconut oil
Directions
1. Add coconut oil to a medium heat pan. Add onions and let cook for about 10 minutes until soften.
2. Add garlic at 10 minutes. Let everything cook another 5 minutes.
3. Add vegetable broth and turn heat up. Just before boiling, turn down heat to a low simmer.
4. Chop the bottom end of each asparagus stalk off, then slice into 1 inch pieces.
5. Add the asparagus, coconut milk, cilantro, salt, pepper and cayenne to the broth and continue simmering on low for about 40-50 minutes.
6. Once done, remove the soup from the heat to cool. Add batches of the soup to a blender or food processor. Strain the soup through a sieve to remove any chunks if you like.
Serve soup at room temperature or warm back up to desired temperature.

Roasted Cauliflower & Bacon Soup
Ingredients
2 large heads of cauliflower, cut into florets
4 tablespoons olive oil
2 teaspoons garlic pepper
3 cups chicken broth
2 cups vegetable broth
1 can full fat coconut milk
1 teaspoon dried thyme
2 tablespoons chopped cilantro
Zest from one large navel orange
Juice from one large navel orange
1 pound pastured bacon
Pink salt & pepper, to taste
Directions
1. Toss cauliflower with olive oil and garlic pepper and place on a rimmed baking sheet. Roast in a 400 F degree oven for about an hour (check it around 40 minutes, you want it just when it starts to get that golden brown color on the cauliflower).
2. While cauliflower is roasting, sauté bacon until crisp and set aside on paper towels to drain. (Alternate method of cooking the bacon is to place the slices of bacon on a rack inside a rimmed baking sheet and cook in the same oven as the cauliflower. Check periodically for crispness. Remove from oven and drain on paper towels when crisp).
3. When cauliflower is done, cool slightly. Transfer to a blender with the thyme, 1 tablespoon of the chopped cilantro, 1-1/2 cups of the broth and the orange juice and zest. Puree until smooth, adding a bit more broth if necessary to achieve smoothness. Place in a large bowl and whisk in the remaining broth and the coconut milk. Cut up the bacon into small pieces and stir ½ of it into the soup. Reserve the other ½ for garnish. Adjust seasoning.
Return to soup pot to warm up and serve with a garnish of chopped cilantro and a bit of the remaining cooked bacon.

Broccoli Pear Soup
Ingredients
2 large heads of broccoli, cut into florets
1 large sweet potato, peeled and cut into small chunks
5 pears, peeled and chopped into large chunks
3 cups chicken broth*
3 cups vegetable broth
Pink salt & pepper, to taste
*you can use 6 cups of vegetable broth to keep it vegetarian/vegan-friendly, and/or if you’re on ReBoot Transformation Protocol week 1 program design.
Directions
1. Put sweet potato chunks, pears and broth into large soup pot and bring just to slight boil (not rolling boil) then reduce heat to simmer.
2. Simmer until soft then add the broccoli florets. Cook 5 minutes more and remove from heat.
3. Let cool a bit and adjust seasoning.
4. In batches, pour into a blender and blend until smooth. Put each batch of blended soup into a large mixing bowl. When all the soup has been blended, whisk until totally incorporated and smooth.
5. Taste for salt and pepper. Reheat in large soup pot until just warm or serve room temperature (even cold this soup tastes good to me)

Sweet Potato Apple Soup
Ingredients
4 small sweet potatoes, peeled and sliced into ½” rounds
1 medium onion, chopped
1 package of dried apples (3 oz)
2 teaspoon garlic pepper
3 cups chicken broth*
3 cups vegetable broth
Pink salt & pepper, to taste
*you can use 6 cups of vegetable broth to keep it vegetarian/vegan-friendly, and/or if you’re on ReBoot Transformation Protocol week 1 program design.
Directions
1. Place dried apples in small bowl and cover with some of the broth (vegg or chicken) to reconstitute.
2. Place sweet potatoes onto baking sheet. Chop onion into large chunks and place on top of sweet potatoes on baking sheet
3. Roast at 375 degrees until sweet potatoes are soft when pierced with a fork. Est. 20 minutes.
4. When apples are reconstituted, place them with the broth they’ve been soaking in, onions, sweet potatoes and garlic pepper in blender. Add 1 cup of the broth (either vegg or chicken).
5. Puree until smooth, adding a bit more broth if needed to blend thoroughly.
6. Pour mixture into large mixing bowl and whisk in the rest of the broth until smooth.
Can be eaten at room temp or placed in large soup pot to heat as warm as you like.
Julian here! and we all know stretching is important, but flexibility training seems to be the most overlooked practice by fitness enthusiasts. Flexibility is defined as the ability of a joint to move through a full range of motion (ROM). Rather than bore you with definitions, I’d rather illustrate a couple of key points on why being flexible is important!
Major benefits associated with superior flexibility include a reduction in the rate of functional decline; increased training capabilities; improved postural symmetry and muscle relaxation; reduced tension in muscles, joints and connective tissues; a reduction in the risk for injury; potential relief of pain; and improved quality of life.
I’ve worked with hundreds of clients, and I can say from my personal experience that approximately 9 out of 10 people I evaluate have at least some form of muscle tightness, postural distortion, or muscle imbalance. Inflexibility can potentially lead to musculoskeletal injuries as a result of various mechanisms, including the loss of postural symmetry, distorted muscle alignment, excessive soft tissue stresses, and movement compensations during exercise and movement. For these reasons, it is crucial that proper ROM is addressed in the first stages of a good exercise program. I always use the example of a back squat. In order to get into proper back squat position, you need adequate ROM in the hips and lower body musculature. If a person with insufficient flexibility is prescribed back squats as part of an exercise program, the movement becomes contraindicated because improper form will lead to a number of complications. To put it simply, a functional musculoskeletal system represents the foundation of movement efficiency.
So how do you become more flexible? There are two major categories of flexibility training: dynamic and static. Dynamic stretches involve controlled movements through the active ROM for a joint, whereas static stretching refers to taking a joint to the end of its ROM and holding the stretched position for a set period of time. I know what you’re probably wondering: when should I incorporate each?
Based on the available research, dynamic stretching appears to have either no effect or a slight acute improvement in performance. On the contrary, static stretching performed for >45 seconds appears to lead to meaningful acute reductions in performance tasks. Additionally, stretching prior to a bout of exercise when the muscles are cold may cause an increased susceptibility to injury since the joint and muscles are stiff. In contrast, stretching after a warm up that uses increased blood flow through dynamic means and aerobic cellular respiration reduces the viscosity of movement and stiffness of the muscles/joints used.
Taking this into consideration, dynamic stretching is recommended prior to exercise, while static stretching should be left for after your workout.
Upper body and trunk static stretches
Hold each stretch for 15-45 seconds
Lower body static
stretches
Hold each stretch for 15-45 seconds
Total Body Dynamic Stretches
Go through full range of motion in a controlled manner during each movement.
Lastly, most of you have probably heard of foam rolling by now. Foam rolling is a form of self-myofascial release that involves applying sustained pressure into the myofascial connective tissue restrictions to eliminate pain and restore motion. These restrictions can be caused by trauma and inflammatory responses, so if you’ve ever done any type of physical training, you may have experienced the pain and tightness associated with these restrictions.
Although foam rolling is a relatively new technique and there are limited studies on it, research shows that foam rolling could reduce arterial stiffness, improve arterial function and improve vascular endothelial function and increase joint range of motion while not impeding the production of muscular force or rate of force development and having no detrimental effects on athletic performance pre-workout. Additionally, this study found that foam rolling may also reduce muscle soreness. Based on these findings, it would be beneficial to use a foam roller before and/or after your workout to improve blood flow and flexibility, while possibly reducing muscle soreness.
Tip #1:
Always try your best to buy local from your farmers market, or other local sources.
Why? Reason being is food you find in your major grocery stores, whether organic or non-organic, has usually traveled a fair amount of time before actually getting on that store shelf. Just the other day I bought some fruit that was organic, but it said “from Ecuador”. Not my preference.. but imagine from picked to transit to shelf to my basket to my mouth and assimilated in my cells.. how long that fruit traveled to get to me?
Not to mention, if you’re eating non-organic produce, they’ll use chemicals like 1-MCP (1-methylcyclopropene) and cold storage methods to store foods for months at a time, sometimes even more than a year. In fact, in Martin Lindstrom’s book Brandwashed: Tricks Companies Use to Manipulate Our Minds and Persuade Us to Buy, he states the average apple on store shelves for example are 14 months old.
Then when a certain produce is out of season, they’ll pull it out of the warehouses for the store shelves, yet to us, the consumer, we see it as “fresh” on the store shelves.
With local, in-season, farmers market sourced foods, or even from community supported agriculture (CSA) near you, the produce is usually picked day-of or day before, so “transit time” is as low as it’s going to get unless you have a garden and pick your foods fresh garden-to-table. And we don’t have to worry about warehouse time like 14 months!
To find farmers markets or a CSA near you, try Local Harvest and Farm Plate.
Tip #2:
If time permits, try and shop at least 2 times a week. Personally, I’ll usually get a food haul in on the weekend, and then another mid-week mini haul on a Wednesday. But I’ve had clients I’ve consulted with who told me they shopped once or twice a month. Big Food and major grocery stores allow us to do that these days, but believe me when I say you’re sacrificing your health for convenience if you’re not buying foods fresh and/or constantly eating foods that have an expiration date months down the road.
Food, by nature, is designed to spoil and break down by the decomposers in a few weeks time. It’s part of the closed-organic life cycle, or wheel of life.. if you take your food scraps like fruit and vegg waste and throw them into a pile, that pile of scraps will decompose and transform into compost, organic soil matter for plants to essentially re-grow again. The decomposers like fungi and bacteria eat the decaying organic matter, essentially poop it out, and creates new organic matter for life to grow in again. We’ll get into that in Part 2 of the Organics Series at the end of the week (see part 1 here), but all organisms, including us, are very much integrated into this cycle.
As for foods once you purchase them, here is a produce storage cheat sheet you can use.
Tip #3:
Meal prep your foods as soon as you buy them rather than stocking up your fridge. This will ensure you’re eating your freshest foods, as well as help with time management with your shopping and meal prepping. For me, if it’s a Wednesday for example, that is usually my mid-week off day for the gym. I train 2 days on, 1 day off, so on that off day in the evening, I’ll allot about an hour and a half where I’ll grab a few things at the store or farmers market and prep them when I get home (the time I would have been say at the gym working out).
I’m also big on maximizing time efficiency, so when I’m doing a meal prep like this, I’m usually listening to an audiobook, or I’ve got my iPad out in the kitchen and listening/watching a lecture, seminar, or other continuing education. It’s just a little “time hack” you can try that I find valuable as a two-bird-one-stone for the priorities in my life. You might have a different priority, but the point is if you can do it while spending 30 minutes to an hour in the kitchen, it’s a great way to piggyback your time if you have a busy schedule.
We hope you enjoyed Volume 4 of The Body Transformation Series. Be sure to check out our previous series for more insightful health, nutrition & fitness tips and secrets!
If you have any questions for Julian or myself, don’t hesitate to ask below! We’ll be happy to address them.


Another great series, thanks!
Cheers Kevin, glad you enjoyed!
Oooooh I LOVE homemade soup. They all sound amazing I don’t know which one to make first 🙂 🙂
Thank Jenn! my favorite was the sweet potato apple.. can’t go wrong with that one
Great blog post! I definitely need to incorporate more flexibility into my training. Thanks for the tips!