If you’ve been following me on Instagram, I’ve posted a couple sneak peek pics of this garden bag idea as it was growing over time and you gals & guys seemed to love it, so I wanted to put together this DIY post with sequencing and time-lapse pics so you can see exactly what I did, and the growth of the veggies in real-time each week through the pictures.
This garden “grow bag” idea is great if you’re limited on outside space for a garden… a balcony, porch, concrete patio… whatever your living space may be, you’ll be able to grow your own food in abundance, for the mere size of a bag of soil, and the total cost of some take out food.
Cool stuff, right?
And overall, look at it as being a wise investor… an investor into your health, as well as into your bank account. The total cost of doing this DIY garden bag will pay itself back many times over time as “food profits”, ultimately saving money on your weekly/monthly grocery bill.
My kind of investment. Let’s take a look at how I did it.
Getting Started
First thing you’re going to need is a bag of soil and seeds.
I do not recommend buying cheap, synthetic chemical-laden soil (Miracle Gro for example) if you’re wanting the healthiest veggies possible. Invest in your health and buy a quality organic or biodynamic soil blend (biodynamic is the highest quality soil and farming/gardening method there is). You can find a quality soil for $10-$20, maybe less.
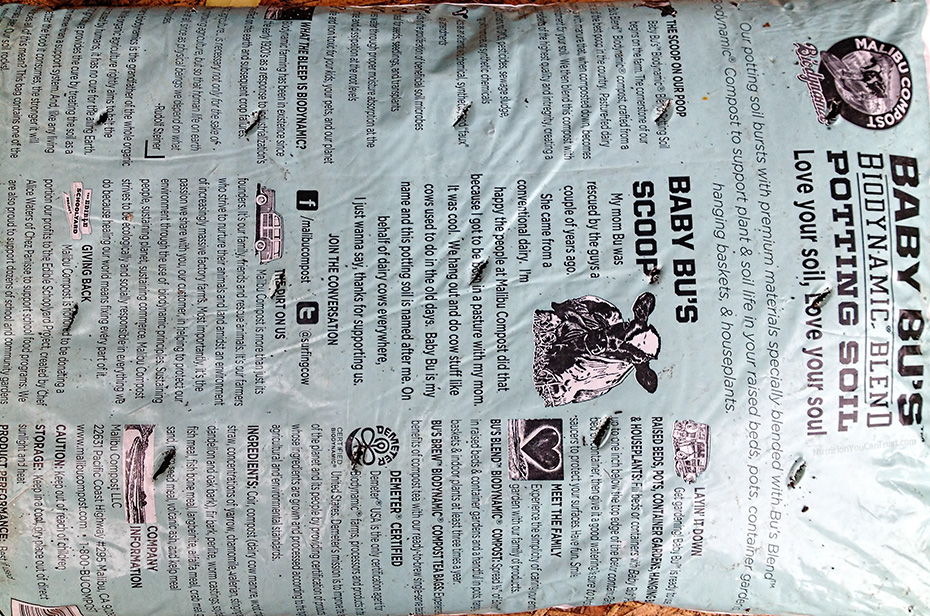
My favorite is Baby Bu’s Potting Soil made by Malibu Compost and it’s what I used for this garden bag. It’s a biodynamic blend of their soil and compost. They also have pure compost too (I always add this stuff to the rest of my garden each season to “supercharge” the soil).
If you’re unsure of the soil options in your area, just ask me below in the comments (include the soil brand name and the website) and I’ll let you know my thoughts.
Remember, health starts in the soil… if we want a high quality healthy food, and thus, high quality healthy body (you are what you eat), invest in a high quality healthy soil. Cheap, inferior soil does not = superior quality food.
As for seeds, I grew lettuces, cilantro and arugula in this. The root depth works and these veggies grow great in semi-shade (more on that at bottom). Something like tomatoes, zucchinis, etc. won’t work too well, for two reasons: tomatoes as the example that the roots grow deep and the plant grows really tall, and zucchini plants grow massive horizontally (big leaves).
The vegg I used works great because they grow mostly vertical and squeeze in between spots, root depth works fine for the depth of the soil bag laying flat, and this entire garden is going to be a regenerative food source for you (more on that below too).
If you have other seed ideas you want to try, again just ask in the comments below and I’ll let you know my thoughts.
Here’s the DIY steps:
First figure out where you want to put your garden bag.
After we start manipulating the bag, we won’t want to move it.
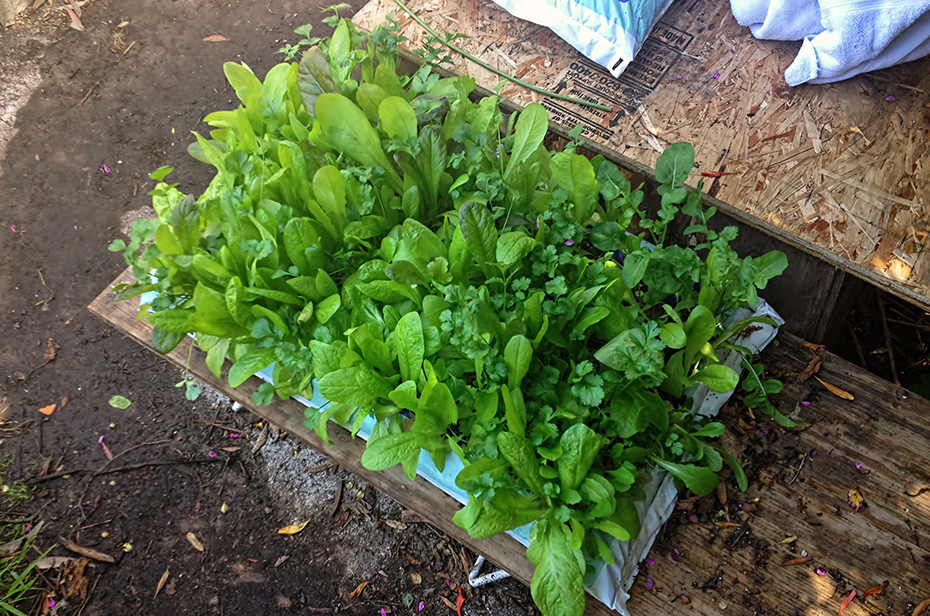
Here’s a trick: If you want, do like I did and put the garden bag on a piece of plywood at least the same length of the bag, if not a little longer. That way if you decide to move it, you can easily lift the wood up and move it wherever you like. You’ll notice in the time-lapse pics below, over the weeks, I moved it around, and it was a piece of cake to do with it being on the wood.
Step #1: On the back of the soil bag, poke small holes for water drainage.
Above I have 4-5 holes in 3 rows I poked with a knife.

Step #2: Flip bag over and lay it flat, smoothing out the soil so it’s level across
We don’t want a big clump at one end as if the bag was standing vertical, so make sure nice and even across
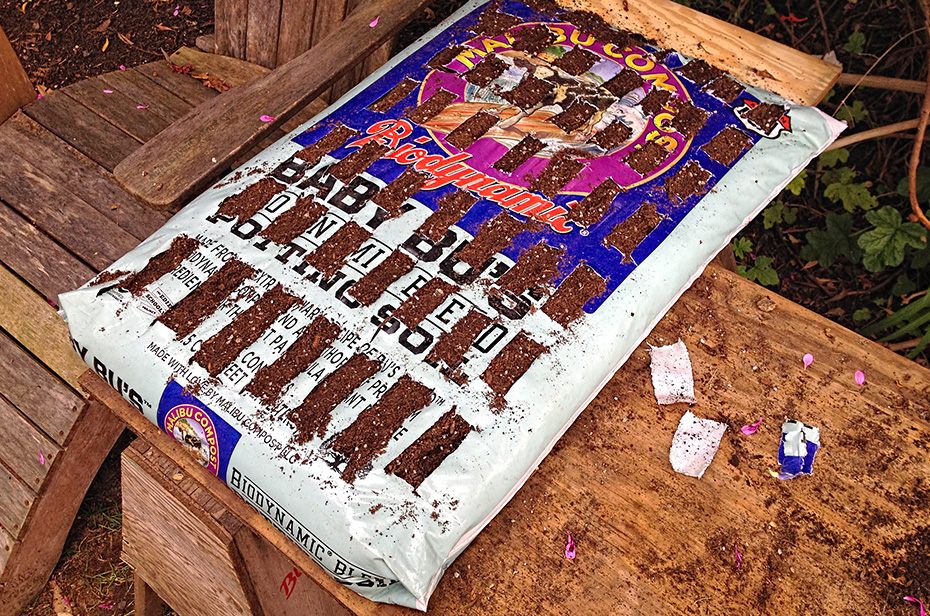
Step #3: Take a knife and cut out slits. Pictured is 7 x 7, for 49 total spots
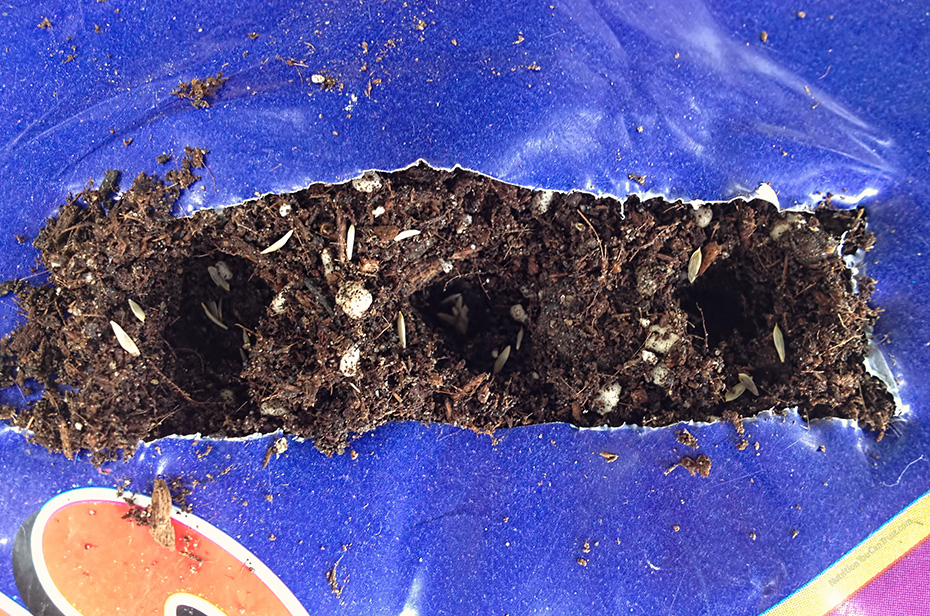
Step 4: In each slit, use your finger to poke 2-3 holes about 1/4 – 1/2 inch deep and add your seeds
Pictured above: Lettuce seeds and I put 3-4 in each hole (arugula can do the same)
Cilantro: I did 2 seeds each hole, but separate (i.e. not in same holes as the other seeds)
Once your seeds are in each hole in all spaces, smooth over and cover with soil then lightly water.
All done. Now time to wait. . . . .
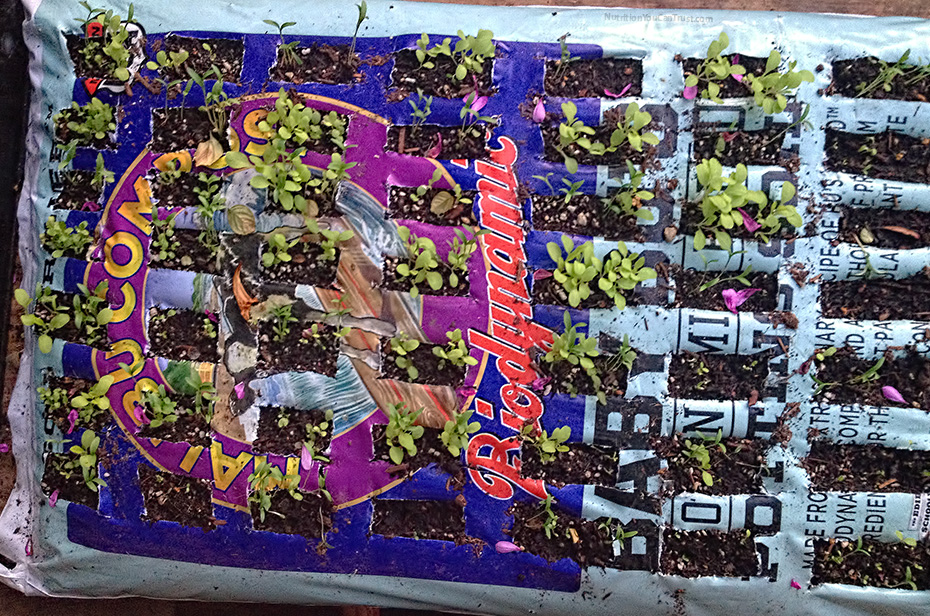
Time-lapse: Week 1-2

Time-lapse: Week 3-4
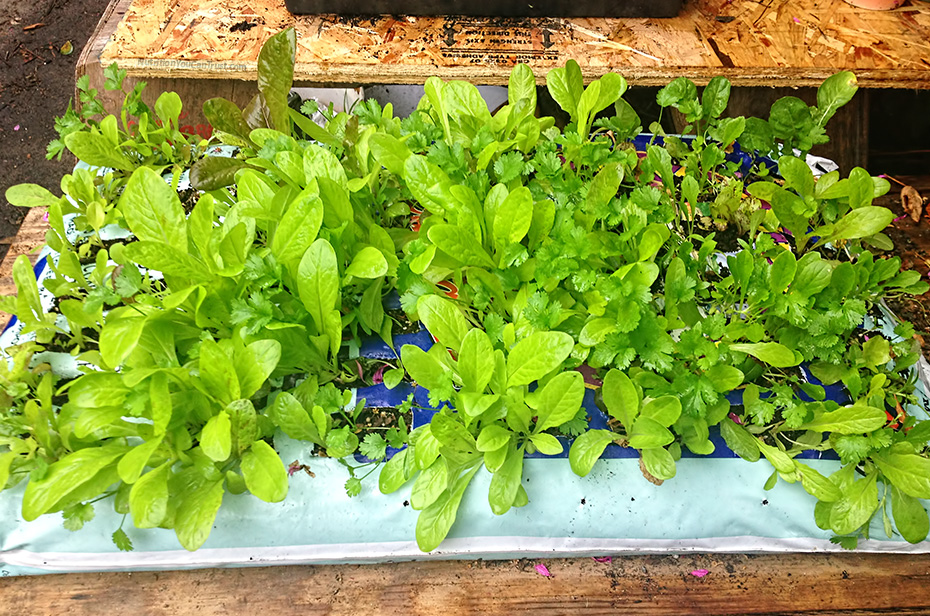
Time-lapse: Week 5-6
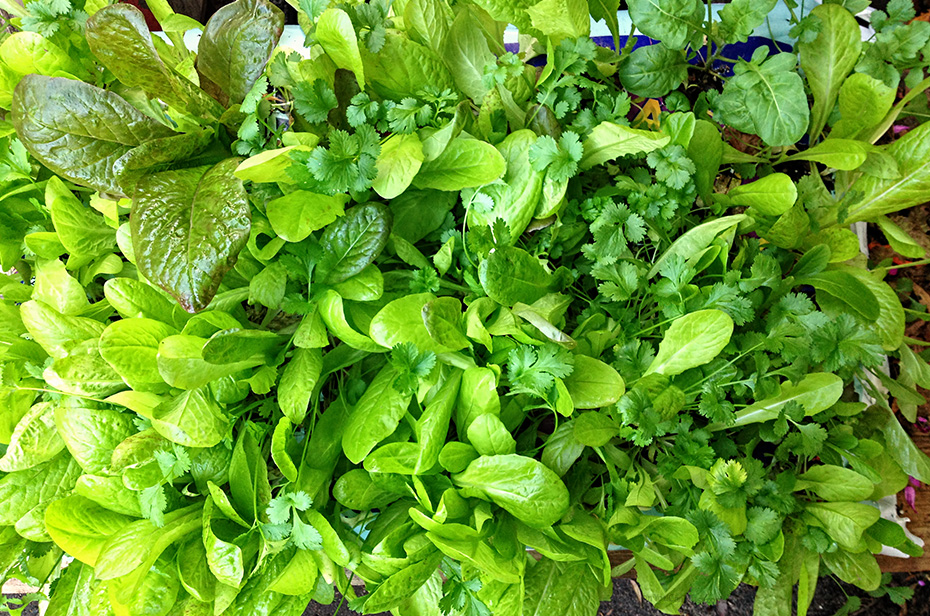
Time-lapse: Week 6 and ready to start picking
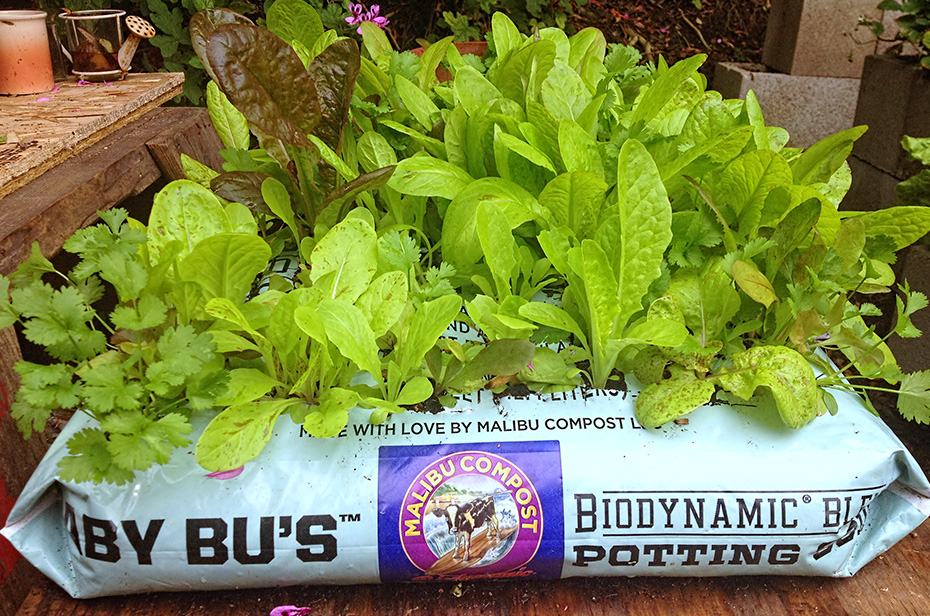
Time-lapse: Week 6 – standing view to show height of the plants
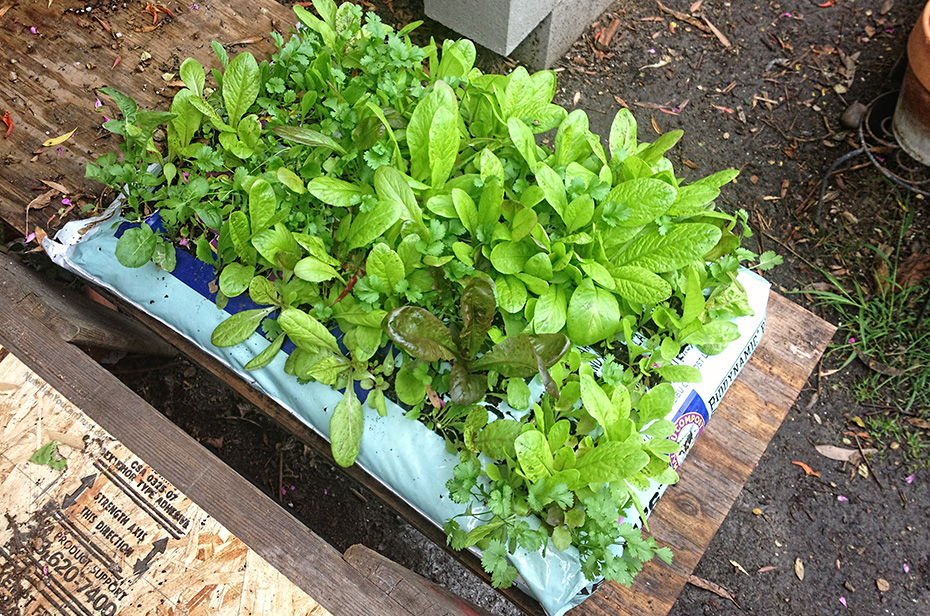
Time-lapse: Week 6 – aerial angled view
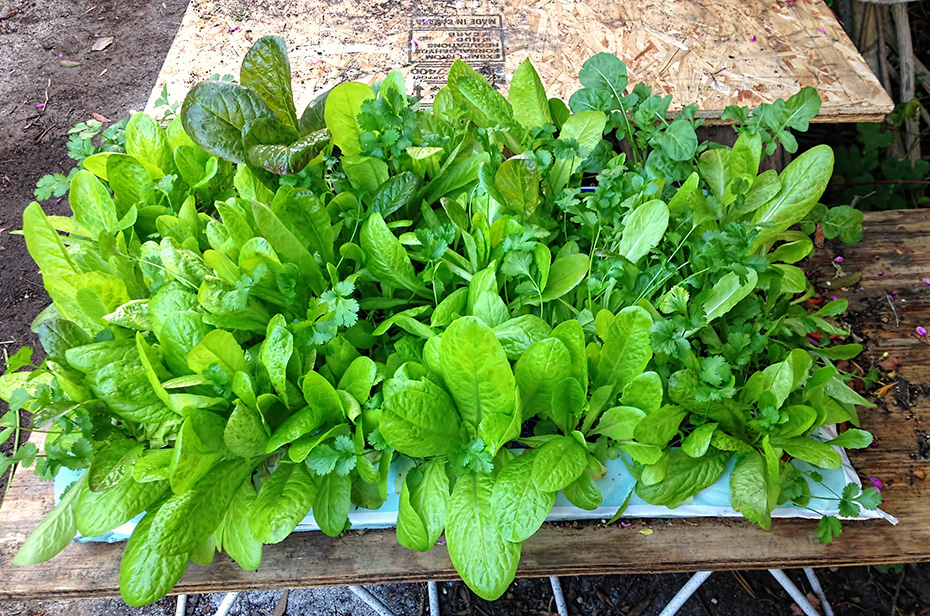
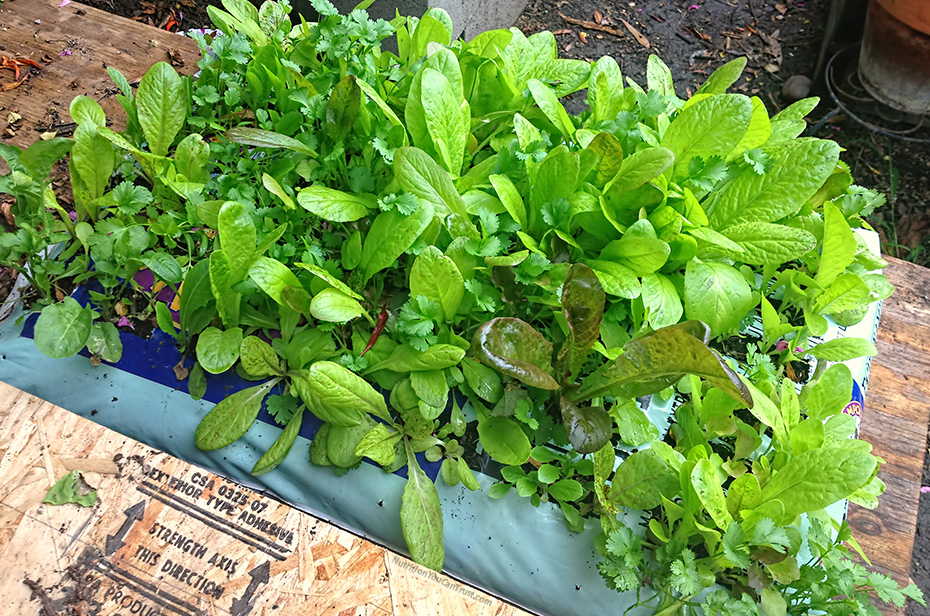
Time-lapse: Week 7 – front view
Time-lapse: Week 7 – back view
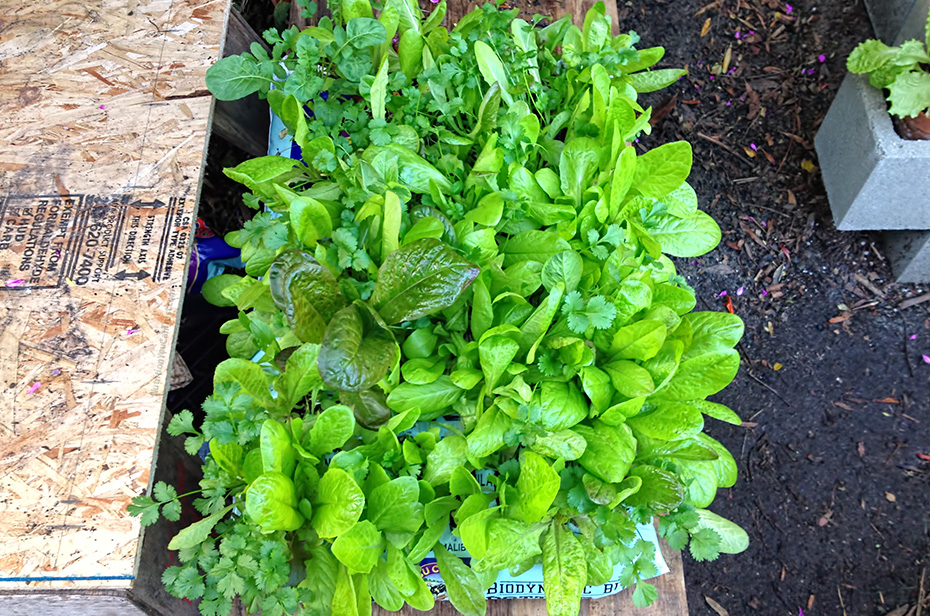
Time-lapse: Week 7 – vertical view
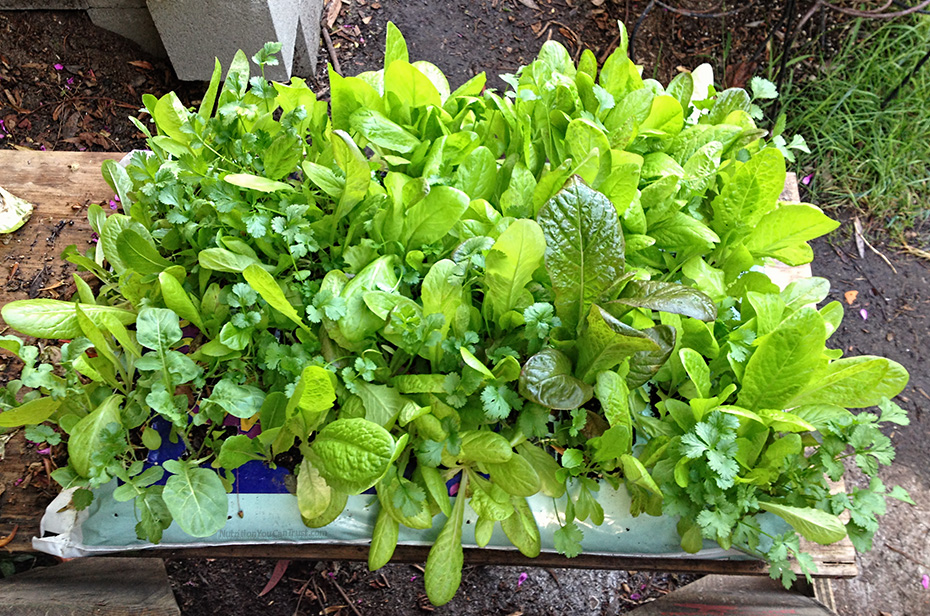
Time-lapse: Week 7 – direct aerial view
Time-lapse: Week 7 – Aerial view picture taken at noon with sun directly above (still in shade)
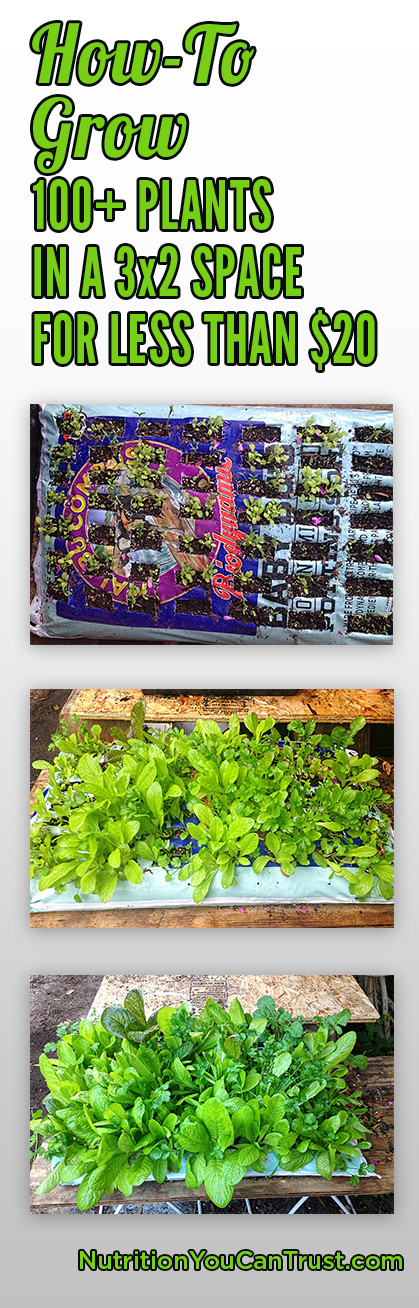
Click here to Pin and share with others!
What I used:
1. SOIL: Baby Bu’s biodynamic potting soil blend by Malibu Compost – 1.5 cubic feet (42.4 liters).
- Important: make sure you get a bag of soil that is not loaded with fertilizer or it can “burn” the seeds and they won’t grow. You’ll likely get your bag from a local nursery, so let the person know you need soil for starting seeds in (and if you can get your hands on the Bu’s I used, get that!)
2. SEEDS: Saved seeds – lettuce, cilantro and arugula. If you don’t have saved seeds, there’s recommended brands below.
3. OTHER: Piece of plywood for easy moving (optional) and elevating the garden bag off the ground (more on that below)
Space you need:
3 feet x 2 feet space, and that is rounding up. The bag itself is smaller than that. I rounded up for any veggies that hang over the side.
Where I have the garden bag located:
Mine is in the backyard, but the concept of this garden bag is it’s a good amount of food in a small space that you can put almost anywhere: a balcony, small patio, front or back porch, etc.
My garden bag is in a semi-shaded area. No direct sun. It gets evening light.
You don’t want direct sun specifically with the plants I grew.
As a general rule, if you’re growing for leaves, semi-shade works.
If you’re growing for the fruit of a plant, full sun is needed.
I also have my garden bag off the ground with two little side tables I had and wasn’t using, and again, the piece of plywood underneath it for easy moving ability (I started it on two saw horses in the early week pics).
Another idea if I didn’t have the tables is I would use cinder blocks and stack them 2-3 high, stacking the blocks on there side (so the cinder block holes are sideways, not facing up, for a bigger base). This is a cheap way for you to raise it off the ground, cinder blocks are only about $1.50 each… you can even try Craigslist “free section” in your area, people give these away for free (same with your piece of plywood to put on the cinder blocks- people giveaway wood all the time).
Why off the ground? If you have a balcony or enclosed patio, you’ll probably be ok with the bag on the ground. But if you’re going to put it somewhere where animals or bugs cruise around on the ground and can easily get to it, I’d raise it up off the ground. I have little roly polies (pill bug) in my side yard… they’re awesome and have their purpose in the soil/garden ecosystem (they remove and metabolize heavy metals found in soil for example), but they also LOVE chomping on plant seedlings when they just start popping out of the ground (see week 1-2 pic above). If they do this, your plants won’t grow. Once your plants get to a more mature size (see week 5-6 pic above), they don’t chomp them anymore, but then you have slugs, snails, etc. that can.
So safe bet, I recommend having your garden bag off the ground.
What I’m growing in it:
- many lettuce varieties
- cilantro
- arugula
and the cool thing about these is everything pictured I did from saved seeds I had.
I recommend doing the same once your veggies go to flower and seed. A great book I have in my library for how to save seeds is Seed to Seed – Seed Saving and Growing Techniques for Vegetable Gardeners.
I grow these plants year round since I’m in SoCal, but you can also use this Planting Schedule to search your zone by zip code. I also recommend simply doing a Google search of your town/city to search what grows best during certain times. For example “Chicago vegetable growing season”. You can also contact your local nursery and ask.
How much did it cost?
Depending on the soil you use, it will likely be anywhere from $10-$20 for a bag of soil and seeds. The Bu’s by Malibu Compost I used cost me $18 at my local nursery. I’ve grown in all different types of soil, this stuff is hands down the best to date I’ve used.
As for seeds, I used saved seeds so 100% free for me (again, I encourage saving your own–this is how our ancestors did it, right?), but if you buy organic lettuce seed packets, they’re not much, about $2-$3 each packet depending on what you get and they usually have plenty of seeds in them to do an entire bag.
Here’s a couple of my favorite brands and websites for getting seeds:
- Baker Creek Seeds has all heirloom seeds
- The Natural Gardening Company – they’re the oldest certified organic nursery in the U.S.
I use both of these companies. Both have a catalog they’ll send you for free in the mail and both you can order seeds online from their website.
Here’s a list of seed brands / companies that are owned by Big Ag, I would not recommend these as you won’t know which are GMO or not:
- Miracle Gro / Scott’s (soil, seeds, fertilizers…anything)
- Seminis and De Ruiter (Monsanto brand seeds – here’s a chart of more)
- This list can get long, as companies like Monsanto and Syngenta dominate the seed market, so better yet, use this Safe Seed List by the Council of Responsible Genetics showing GM-free seed sources broken down by state.
- Dr. Phil Howard also has a great infographic on the consolidation of seeds/brands under only a handful of major conglomerates (if you’re interested, I also talk about the consolidation of organic foods/brands that are owned by Big Food giants like PepsiCo, Kellogg, General Mills and more in this post here).
How can I tell if the seeds are non-gmo on the actual packet?
1. Look for “Certified Organic” on the packet.
2. If there is no “Certified Organic”, then look for “no-gmo”, “GM-free” or anything that resembles those words. If you don’t see it, make sure to check the back at the bottom in smaller text.
3. If you’re at your local nursery getting seeds, ask the manager working there.
4. Know your farmer (source), know your food- when in doubt, just ask
Jon, what about the plastic chemicals in the bag?
Two things going here…
1. You’ll be growing this in semi-shade, so direct sunlight won’t “heat up” the plastic too much for chemical release.
2. High quality soil and thus, high quality microorganism population in the soil will likely mitigate any chemicals that happen to leach into the soil.
Typically I explain it like this: conventional farms that have been sprayed for years and years with hundreds, if not thousands of pounds of synthetic chemical fertilizers and pesticides, if that farm decides they want to become certified organic, there is typically a 3-year gestation period where no fertilizers or pesticides can be used on the farm/land. Why? This gives the microorganisms in the soil time to “clean up” and metabolize all the toxins in the soil. After that time, you now have a certified organic farm/land and the food coming from it you’ll see labeled at the store as such.
So just more of a reason to get a high quality, organic or biodynamic soil… those little critters will clean up in much of the same way the minuscule amount, comparatively, that may leach into the soil.
How do I get seeds for free if I don’t have any?
If you don’t have any of your own saved seeds, here’s a few ideas:
- Connect with your local farmer or gardener (maybe your neighbor grows?). Try Local Harvest to search farms by zip.
- Search for seed banks and seed lending libraries in your area: watch this video about it more from Growing Your Greens
- Craigslist “free section”: search terms like “garden seeds”, “seeds”, “organic seeds”, etc. in your city and you might find someone in your area with extra seeds they’re giving away (most plants produce hundreds of seeds and all you need is just one seed to plant back in the ground, germinate, grow and produce hundreds of more seeds, ultimately for a recycled food supply).
My garden bag is mature, how do I harvest it?

Harvest above for a garden-to-table salad… my kind of “fast” food
So with the lettuces, cilantro and arugula, it’s pretty simple: don’t pull entire plant/roots from the soil (i.e. don’t harvest the entire plant).
Rather, pick outer leaves off as you need them and the leaves grow back as a regenerative food source for you, until finally the plant goes to flower and seed (in which, we can then save those seeds and regrow = free, sustainable food supply).
Also one last quick tip when plants start to go to flower/seed: The lettuces, cilantro and arugula I’m growing, they’ll begin to get a little taller, thicker stalk, and flower buds will begin to grow from the top of the plant. I pick these off the plant and it encourages the plant to grow more leaves (what we eat, and thus, extended food supply), rather than use its energy resources for the flower, seed formation and reproduction. I’ll do this many times until finally I let it flower, go to seed, and save the seeds to regrow for a regenerative food supply each and every year (sshhh, just don’t tell Big Food or Big Ag).
UPDATE SPRING 2016 BELOW
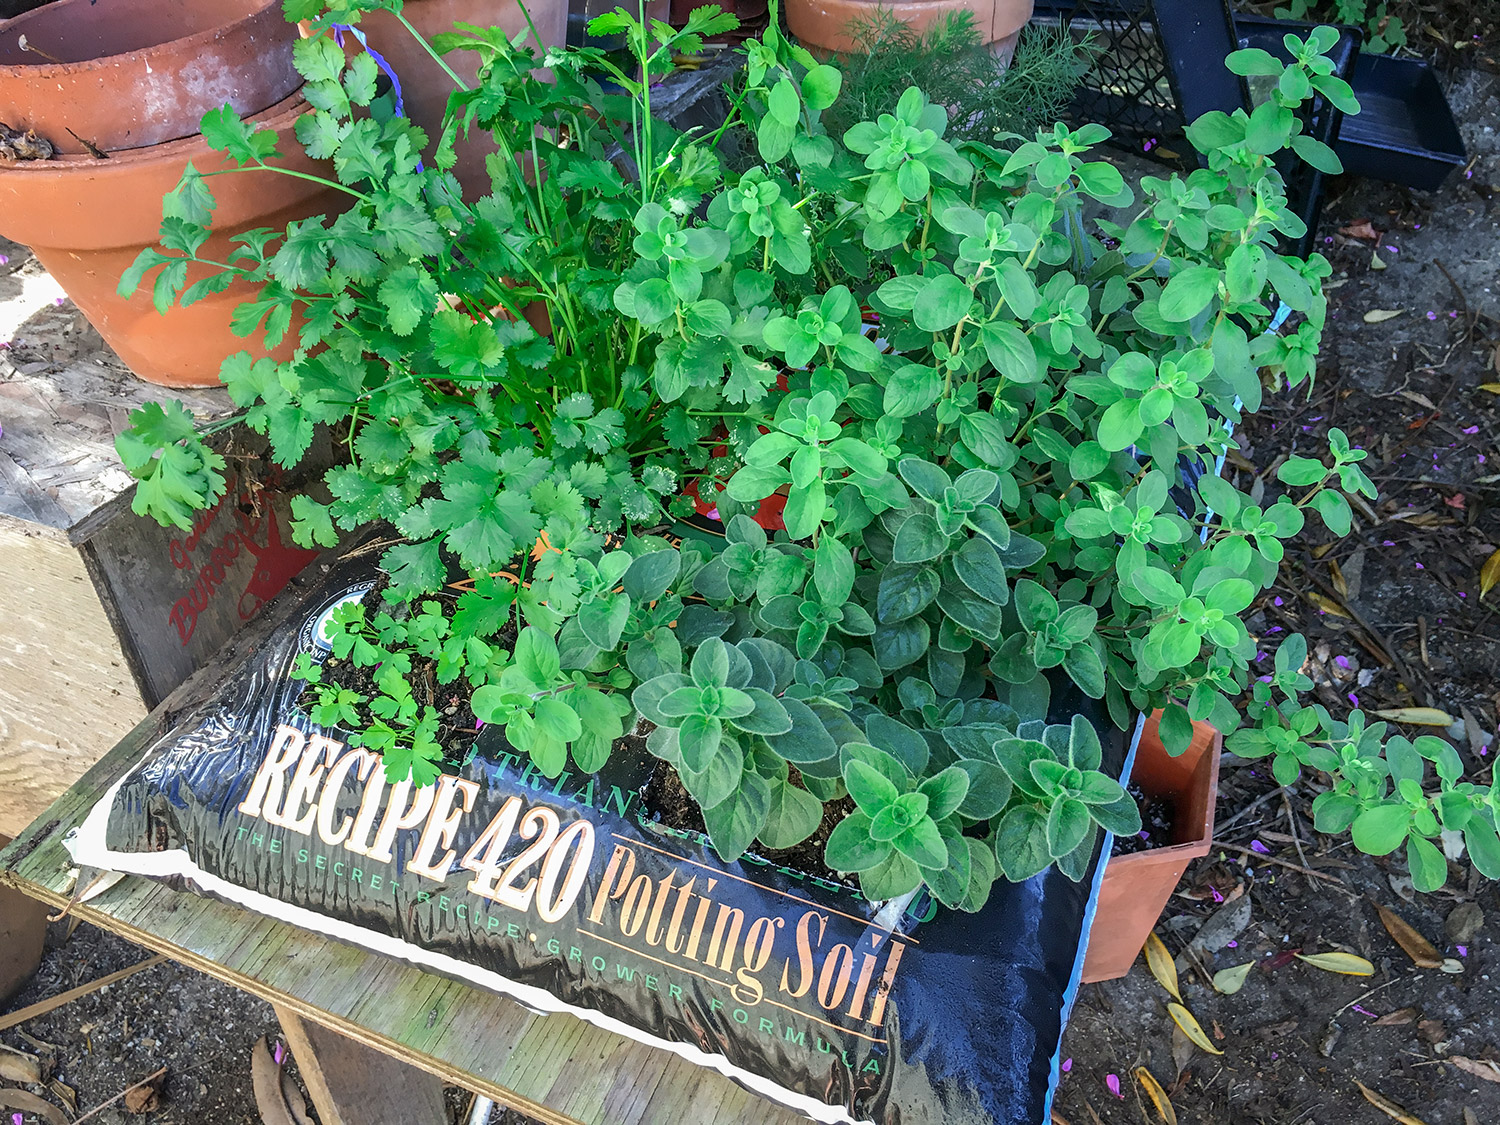
This year I took the same concept as the garden bag we covered above last year, but I created an herb garden instead.
Use the same FYI above to create this version, but here are the few tweaks I made specifically for an herb garden:
- I cut eight large square slots evenly throughout the bag, four slots on each side keeping the center part of the bag intact for bag integrity (see first image below)
- I used herb transplants I got at my local nursery, I did not start them from seed. You can start from seed, but it will just take longer for them to grow.
- Note: when you transplant the herbs, you’ll need to take a big handful or two of soil out of each square area since your transplants have soil already. Rather than waste it, ideally have an extra pot and add each big handful(s) of soil from all eight slots to that and you can start a brand new plant(s).
- Below I have seven herbs showing, and the top left corner with no plant in it I put some of my saved parsley seeds (you can see them starting to grow in the “few weeks later” picture below)
If you have any questions about types of herbs to grow in your herb bag garden, just ask below in the comments and I’ll be happy to help answer. Here’s what mine looks like:
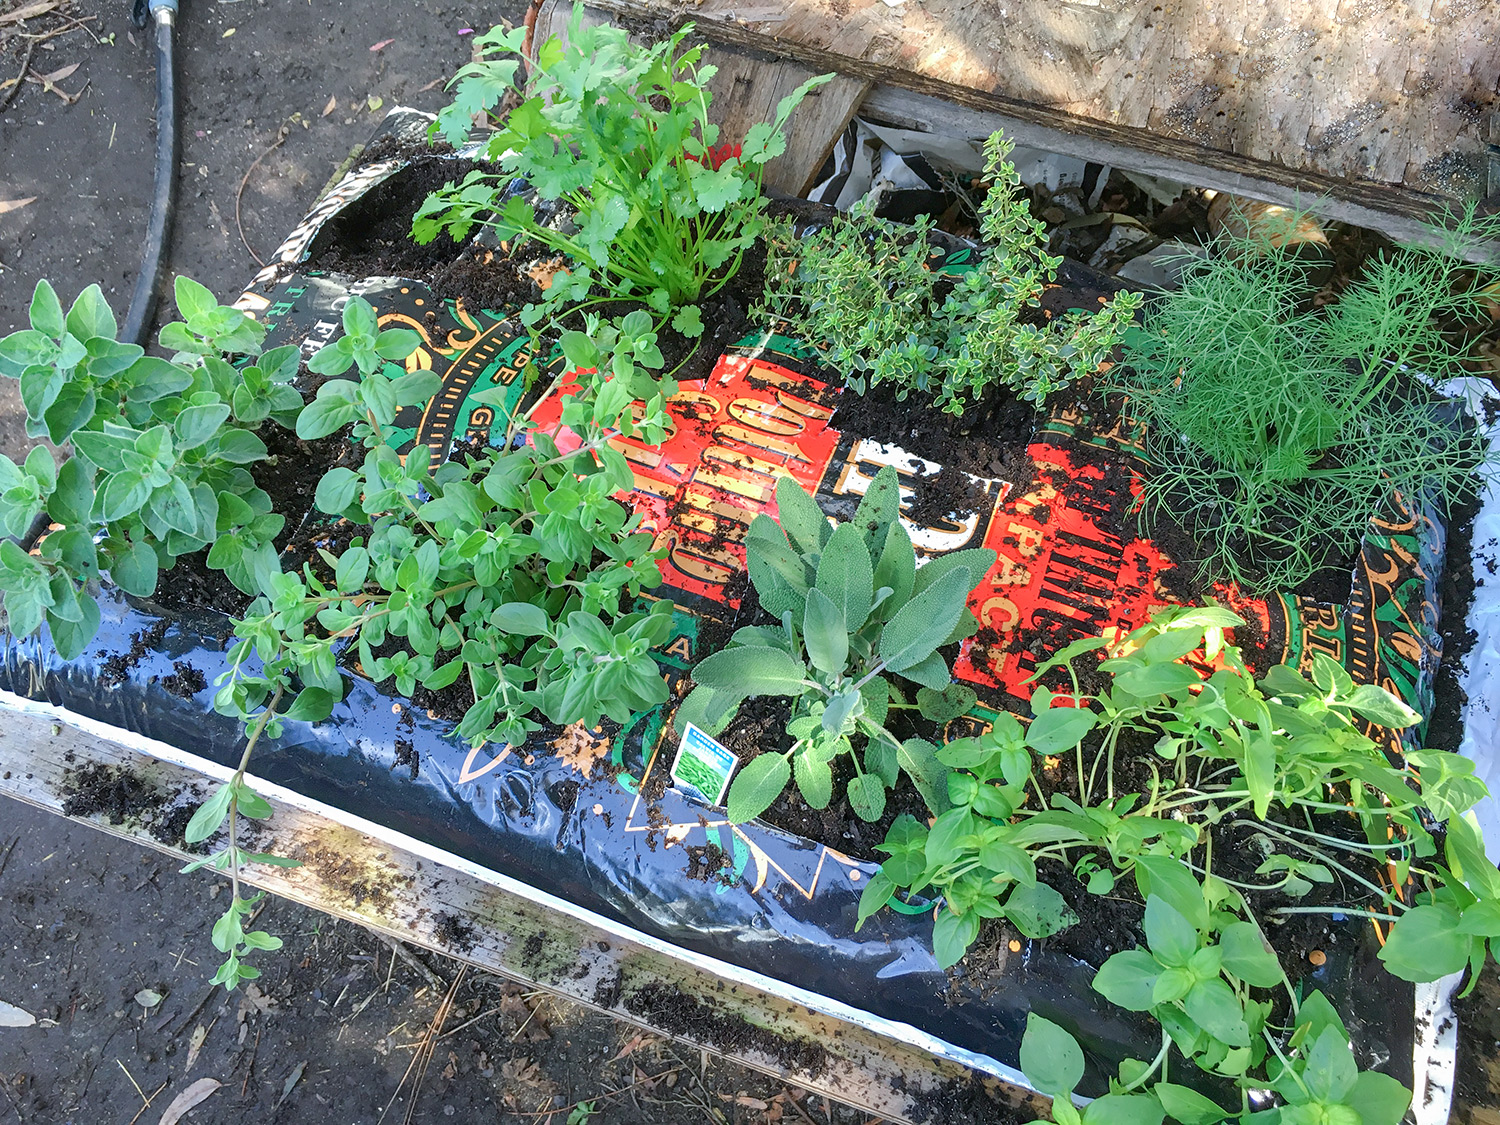
Herbs first transplanted, starting top left: cilantro, lemon thyme, dill, oregano, marjoram, sage, basil
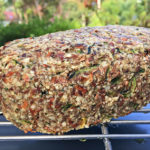
This was just a few weeks later already growing like crazy.
You can hardly see the top part of the bag anymore like the first transplant picture above.
Grow your own herb garden in a tiny space!
Did you enjoy this DIY post?
Will you be growing a garden bag and saving money on your weekly/monthly grocery bill?
If you have any questions, don’t hesitate to ask below in the comments. Happy to help! and happy growing!


What a great post!!!
One question, I hope I didn’t just overlook it in your post.
What about watering?
Cheers Jasmin and great question.. no you didn’t overlook it.
Short answer: just keep your eye on it and make sure the soil isn’t dry and has a nice dampness, but not soaked (or when the plants are finally mature, not drooping over).
Longer answer: will depend on the soil itself, shade, etc. High quality healthy soil will have healthy organic matter that helps retain water (minimizing runoff), so will depend on soil someone uses. The Bu’s I used I lightly watered it first, and I don’t think I watered it again for almost two weeks (mine is in the shade). As the plants started to mature more in the week 3, 4 and 5 pics, I gave them a little drink each week with light water pressure, but never soaked it. You won’t need to water too much at first because just seeds, right? so just getting the seeds damp and making sure soil isn’t dry like I mentioned… but as your plants start to grow and mature like in the week 6 and 7 pics above, they’ll use more water.
Hope this helps..
Thank you for posting this – just in time for gardening season too! I was just wondering if it’d be possible to transport the plants into a separate pot/container once it’s full grown? I was looking to grow a bunch of herbs using this method 🙂
Hi Japhanie, yes definitely! I’ve got more space so I’ve even started to thin my Garden Bag plants out a bit. Since you mentioned herbs.. one thing that is cool that I’ve done is, for example, I had an oregano plant growing in a little pot, I pulled off a stem deep enough down where there were some roots attached to it. Transplanted that little stem into another pot (this was back in February), and now that pot has a big healthy NEW plant growing in it. Great way to grow even more food (or give as cool gifts to friends, family, clients)
This is such a fricken cool post! I’m so doing this, thank you Jon!!
Cheers Brianna.. happy growing 🙂
This is such a great idea! I know what I’m doing for a weekend project 🙂
Excellent, Hannah.. let me know how it turns out for you. If you have any questions, don’t hesitate to ask
Hi Jon! Thank you for this post, it’s giving me so many ideas.
I do have one question: can I plant kale in a garden bag? I was thinking about making one of these to turn it into my “smoothie garden” 😉
Hey Jenna, first off love that idea of a smoothie garden!
That said, kale wouldn’t do too well in this. Kale roots will go deep and wide, and the kale plant will eventually turn into a little kale tree with thick trunk. It’s an awesome plant to grow, I’ve had the same two for YEARS that are like trees and I pull leaves off them all the time for smoothies, sauteed kale as a side dish, etc.. They’re about 5 ft tall, by 3 feet wide in branches, but I have them in a small raised bed.
This is very clever for someone like me with a small patio. thank you for sharing the garden inspiration!
What do you think about doing rainbow chard in something like this?
Good question Wendy.. you could try it, and I say that based on I know I would try it myself. Chards can get thicker stalks and pretty big over time, but if I were doing this from scratch, I would probably try some seeds in each corner of the bag, or even dead center, with the expectation that 1-2 of the plants mature and get big.
This is great! Good project to do with your kids.
Hey Jon! I would love your opinion on Farmer D’s Organic Planting Mix for growing vegetables.
http://www.williams-sonoma.com/products/farmer-d-potting-soil/?pkey=e%7Csoil%7C2%7Cbest%7C0%7C1%7C24%7C%7C2&group=1&sku=8392490&cm_src=PRODUCTSEARCH
Haven’t seen Farmer D before but all looks good at first glance.. says the founder is committed to biodynamic farming.. that’s like “beyond organic” so that’s always a score. I’d say go for it and try it out..Are you doing a grow bag this Spring?
This is a great idea. Very helpful tips for the garden. Keep sharing more